> ## Documentation Index
> Fetch the complete documentation index at: https://lightdash-docs-many-to-many.mintlify.site/llms.txt
> Use this file to discover all available pages before exploring further.
# Lightdash CLI reference
> The Lightdash CLI is the recommended way to develop your Lightdash project. It makes development faster and easier, as well as giving you options for building more powerful automation to manage your Lightdash projects.
## Dependencies
The Lightdash CLI requires Node, NPM, and the [dbt core](https://docs.getdbt.com/docs/core/installation-overview) or [dbt cloud](https://docs.getdbt.com/docs/cloud/cloud-cli-installation) CLI to be installed and available under the `dbt` command.
### Known limitations when using dbt cloud CLI
**Warehouse credentials dependency for some commands**
Affected commands: `lightdash generate`, `lightdash preview` and `lightdash start-preview`
These commands rely on the warehouse credentials from the active project, as the dbt Cloud CLI does not expose credentials directly. Ensure the project's credentials have access to all development and staging schemas for a seamless experience.
**Empty warehouse credentials for new projects**
Affected commands: `lightdash deploy --create`
When using this command to create a new project that is not a preview, the warehouse credentials will not be populated automatically. Users must update the warehouse credentials manually in the project settings page after the project is created.
## Global options
There are three global options that can be used with any Lightdash CLI command: [version](#version), [help](#help), and [verbose](#verbose).
### Version
`--version` or `-V`
Ignores the preceding command and shows the installed CLI version. Usually it's used right after `lightdash`, like this:
```bash
lightdash --version
```
If you need to upgrade your version of the Lightdash cli, run the following in your terminal:
```bash
npm install -g @lightdash/cli
lightdash --version
```
### Help
`--help` or `-h`
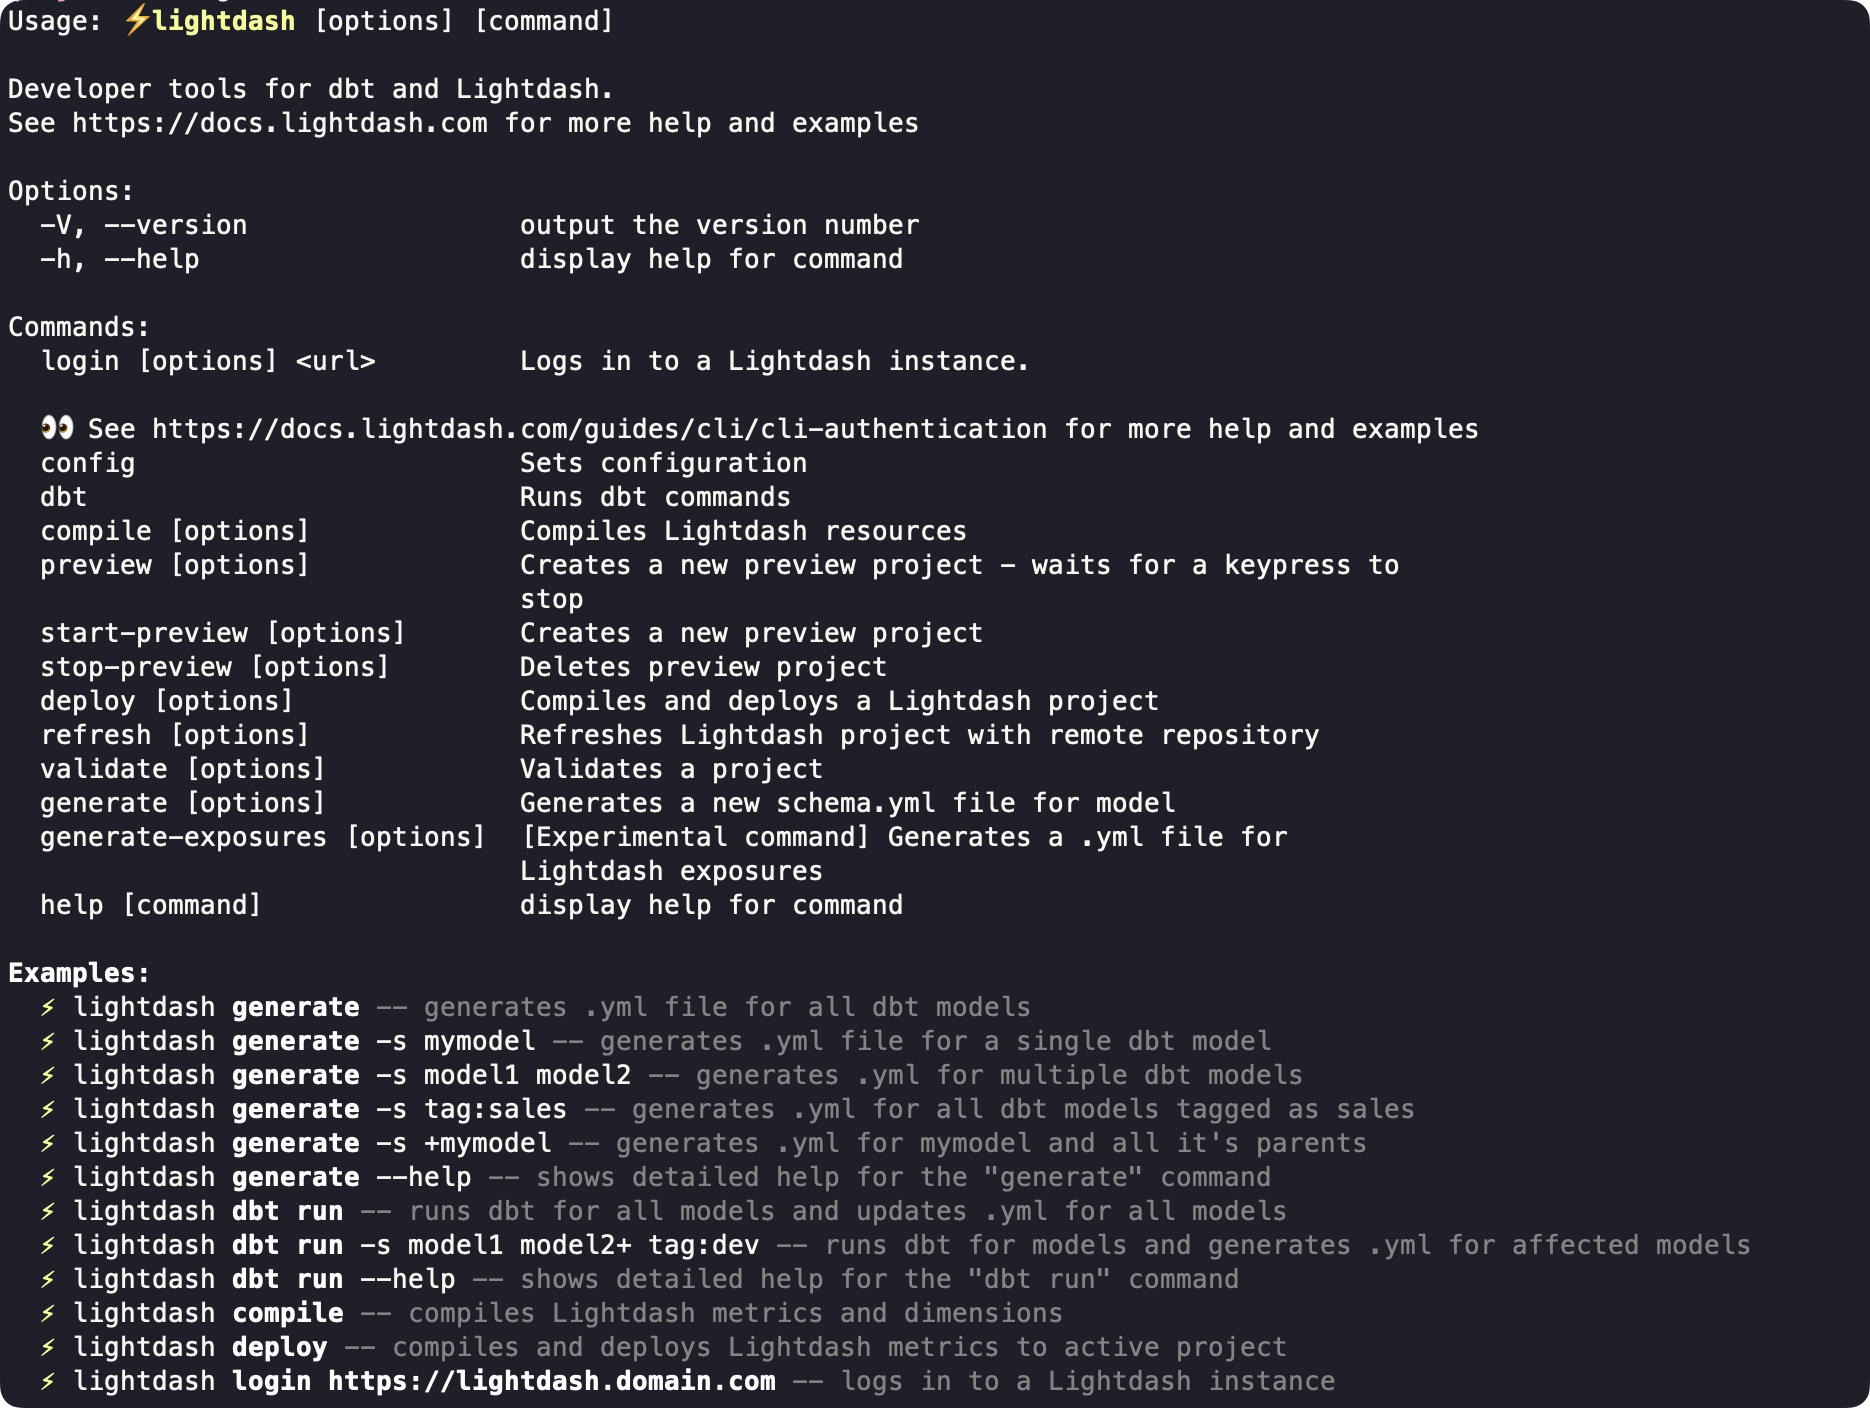
Tells you what the preceding command does and lists all command-specific options. You can view the Lightdash CLI help like this:
```console
lightdash --help
```
That returns the Lightdash CLI help menu:
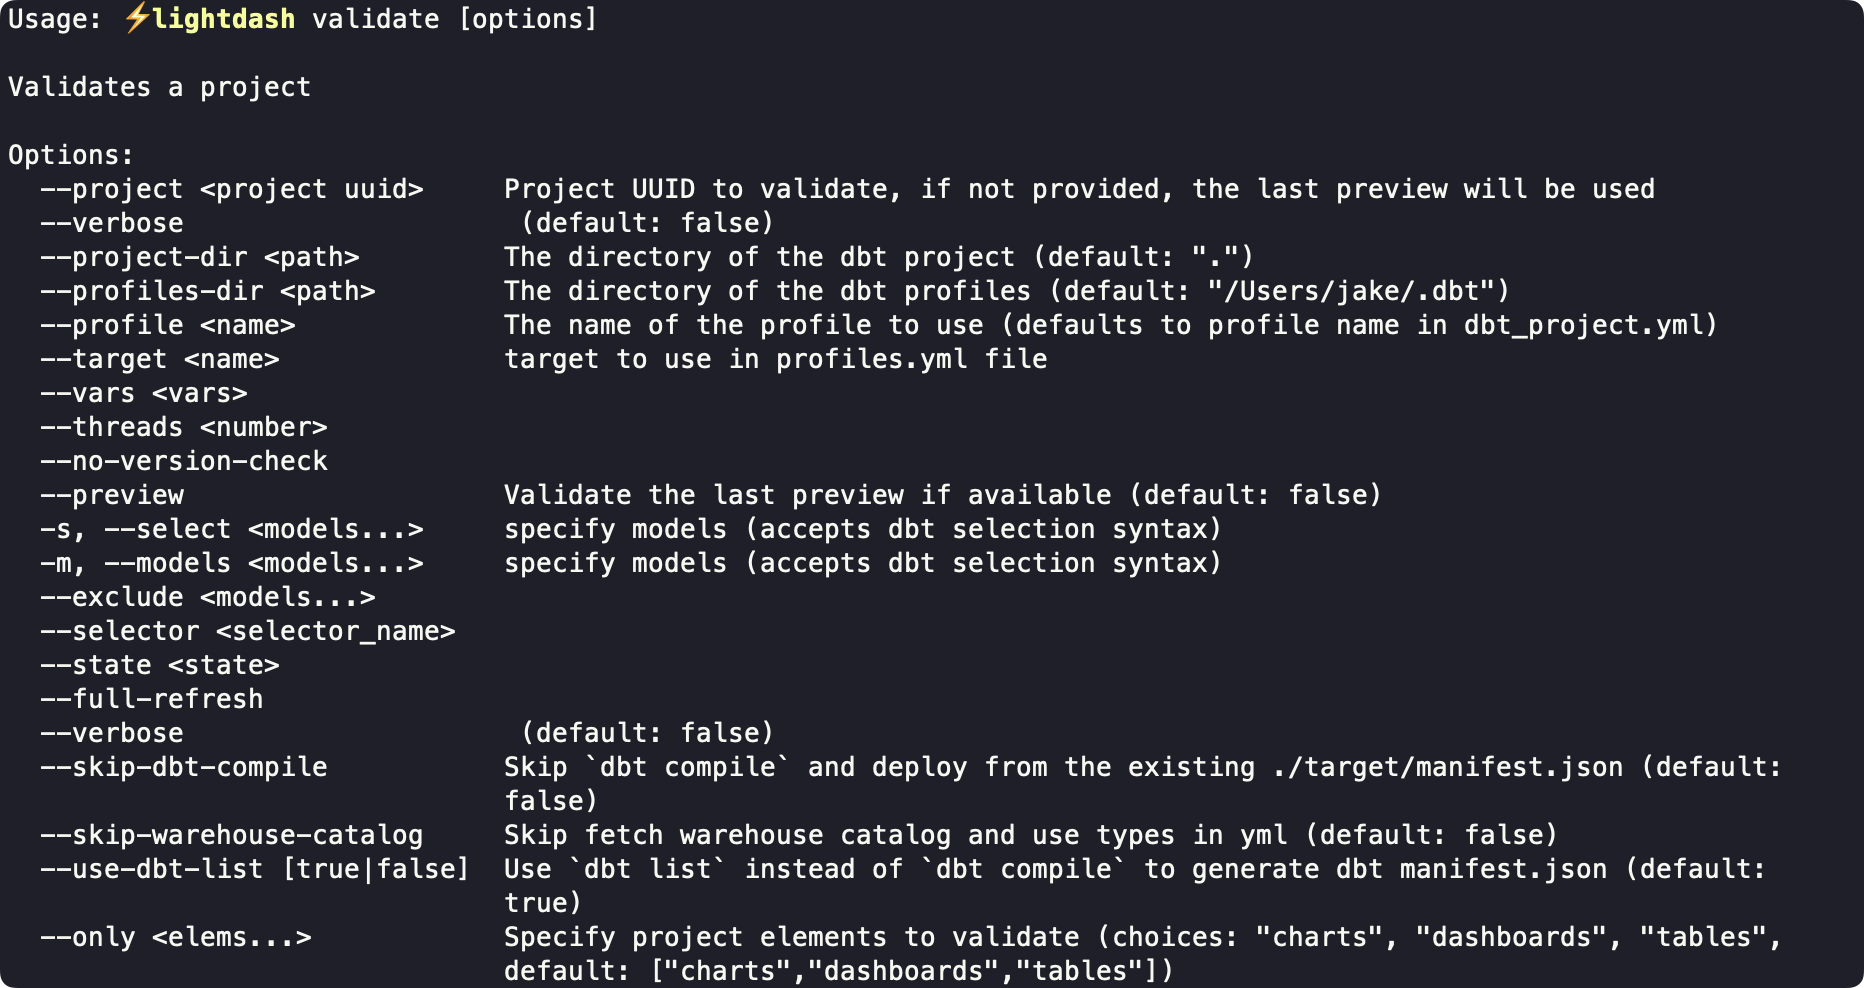
When you use the `--help` or `-h` option with a speific command:
```console
lightdash validate -h
```
That returns details and examples for the command itself:
### Verbose
`--verbose`
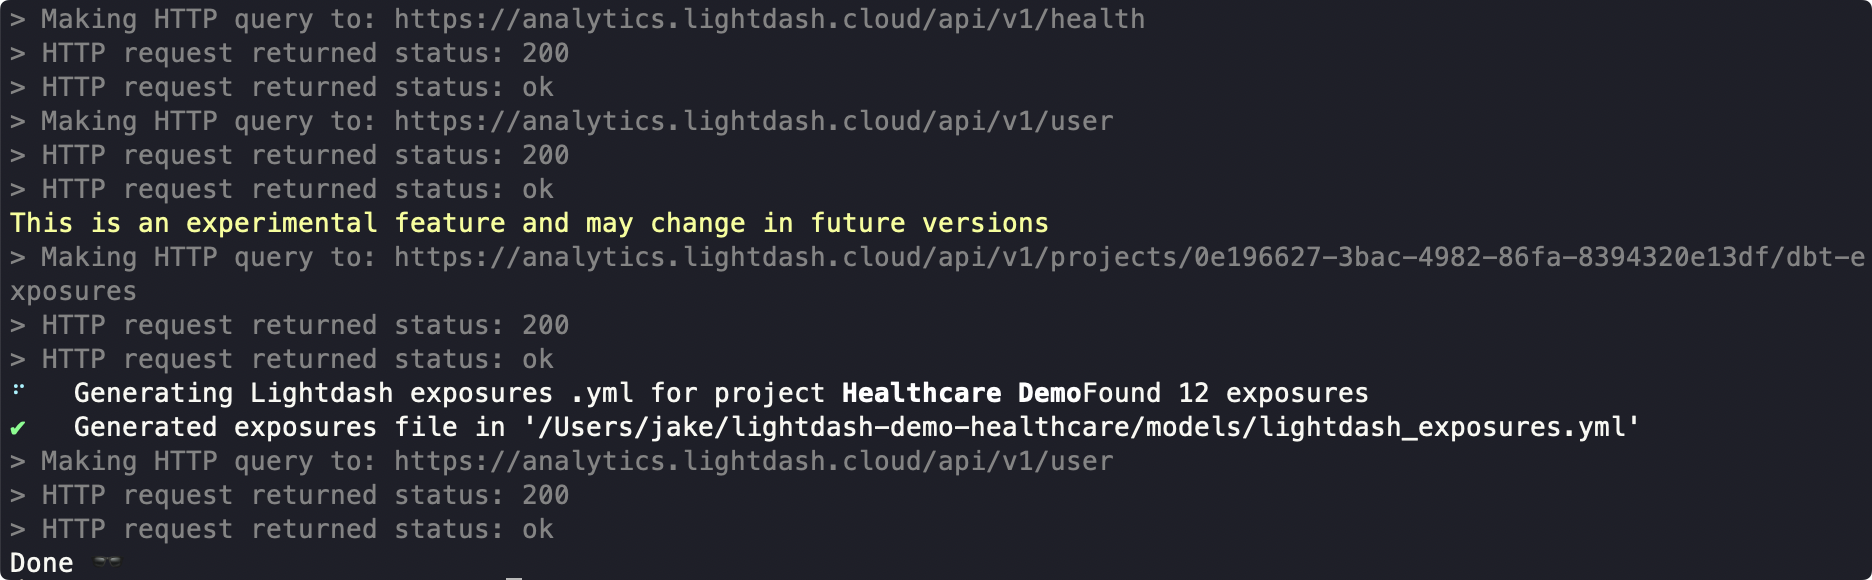
Defaults to OFF. When included, each step will print logs as it progresses through the command. For example, here's a `--verbose` version of `lightdash generate-exposures`:
## Commands
The table below includes a complete list of all commands available in the Lightdash CLI.
For examples and command-specific options, click through the command in the table for docs, or install the Lightdash CLI and use the [global help option](#help).
| Command | Description |
| ---------------------------------------------------------------------------------------- | ------------------------------------------------------------------------------- |
| [`lightdash login`](/references/lightdash-cli#lightdash-login) | Log in to a Lightdash instance using email/password or a token |
| [`lightdash config set-project`](/references/lightdash-cli#lightdash-config-set-project) | Choose or set the Lightdash project you are working on |
| [`lightdash compile`](/references/lightdash-cli#lightdash-compile) | Compile lightdash resources using your local project files |
| [`lightdash preview`](/references/lightdash-cli#lightdash-preview) | Create a temporary preview project, then wait for a keypress to stop |
| [`lightdash start-preview`](/references/lightdash-cli#lightdash-start-preview) | Create a preview project that stays open until it is stopped |
| [`lightdash stop-preview`](/references/lightdash-cli#lightdash-stop-preview) | Shut down an open preview project |
| [`lightdash deploy`](/references/lightdash-cli#lightdash-deploy) | Compile and deploy a Lightdash project using your local project and credentials |
| [`lightdash refresh`](/references/lightdash-cli#lightdash-refresh) | Refresh Lightdash project with remote repository |
| [`lightdash validate`](/references/lightdash-cli#lightdash-validate) | Validate content from your active project against your local project files |
| [`lightdash generate`](/references/lightdash-cli#lightdash-generate) | Generate or update `schema.yml` file(s) for the selected model(s) |
| [`lightdash dbt run`](/references/lightdash-cli#lightdash-dbt-run) | Run dbt, then generate or update `schema.yml` file(s) for the selected model(s) |
| [`lightdash generate-exposures`](/references/lightdash-cli#lightdash-generate-exposures) | \[Experimental command] Generates a YAML file for Lightdash exposures |
| [`lightdash download`](/references/lightdash-cli#lightdash-download) | Download all charts and dashboards from your Lightdash project as code |
| [`lightdash upload`](/references/lightdash-cli#lightdash-upload) | Upload charts and dashboards as code to your Lightdash project |
| [`lightdash rename`](/references/lightdash-cli#lightdash-rename) | Rename model or field names across all your Lightdash content |
***
### `lightdash login`
Log in to a Lightdash instance using email and password or a token.
```console
lightdash login [URL]
```
**Argument:**
* `[URL]`
* The URL for your Lightdash instance (see examples below)
**Options:**
* `--token`
* For logging in with an access token (common for SSO users)
* Exclude this to log in with email and password
* `--oauth`
* (default: false)
* Login using OAuth2 flow (opens browser for authentication)
**Examples:**
Log in to Lightdash Cloud US instance (for most Starter customers):
```bash
lightdash login https://app.lightdash.cloud
```
Log in to Lightdash Cloud EU instance while showing detailed logs of login process:
```bash
lightdash login https://eu1.lightdash.cloud --verbose
```
Log in to a custom domain with a personal access token (exclude `--token` to log in with email and password):
```bash
lightdash login https://custom.lightdash.domain --token bv6105f53cb127087189cfib180a3131
```
### `lightdash config set-project`
Choose the project you're developing in so the CLI knows which project content to look at for other commands like `lightdash validate` and `lightdash preview`. If your organization only has one project you won't need to use this!
```bash
lightdash config set-project
```
This command will bring up an interactive list of projects in your organization to choose from.
If you need to set the project non-interactively, you can use one of the two optional arguments below.
**Options:**
* `--name`
* Set the project non-interactively by passing an explicit project name
* `--uuid`
* Set the project non-interactively by passing an explicit project UUID
**Examples:**
Set project to "Healthcare Demo":
```bash
lightdash config set-project --name "Healthcare Demo"
```
Set project to the one with this UUID:
```bash
lightdash config set-project --uuid "d75379bc-f6e9-4e52-86b2-d897cabacd0c"
```
### `lightdash compile`
Compile Lightdash resources using your local project and database credentials. dbt gets compiled first, then your Lightdash explores. If you use [dbt node selection](#dbt-node-selection) to only compile a subset of models, Lightdash will also compile models joined to those models to ensure no field references are broken.
All standard [dbt options](#dbt-options) work with `lightdash compile`.
**Options:**
* `--skip-dbt-compile`
* (default: false)
* Skip `dbt compile` and deploy from the existing ./target/manifest.json
* `--skip-warehouse-catalog`
* (default: false)
* Skip fetch warehouse catalog and use types defined in the YAML
* `--no-warehouse-credentials`
* (default: false)
* Compile without any warehouse credentials. Skips dbt compile + warehouse catalog
**Examples:**
Compile the whole project:
```bash
lightdash compile
```
Compile only the `accounts` dbt model, then your Lightdash explores:
```bash
lightdash compile -s accounts
```
Compile your project, but skip `dbt compile` and warehouse catalog:
```bash
lightdash compile --no-warehouse-credentials
```
### `lightdash preview`
Spin up a temporary preview project using your local project files and content (charts and dashboards) copied from your [selected project](#lightdash-config-set-project).
All standard [dbt options](#dbt-options) work with `lightdash preview`.
**Options:**
* `--name [preview name]`
* Custom name for the preview project. If a name is not provided, a unique, randomly generated name will be created
* `--start-of-week [number]`
* Specifies the first day of the week (used by week-related date functions)
* 0 (Monday) to 6 (Sunday)
* `--skip-dbt-compile`
* (default: false)
* Skip `dbt compile` and deploy from the existing ./target/manifest.json
* `--skip-warehouse-catalog`
* (default: false)
* Skip fetch warehouse catalog and use types defined in the YAML
* `--no-warehouse-credentials`
* (default: false)
* Compile without any warehouse credentials. Skips dbt compile + warehouse catalog
* `--use-dbt-list [true/false]`
* (default: true)
* Use `dbt list` instead of `dbt compile` to generate dbt manifest.json
* `--ignore-errors`
* (default: false)
* Allows deploy with errors on compile
* `--table-configuration [prod/all]`
* (default: all)
* If set to 'prod' it will copy the table configuration from the source project
* `--skip-copy-content`
* (default: false)
* Skip copying content from the source project
**Examples:**
Create a temporary preview project with the name **PR: Add Revenue Metric** and ignore validation errors while spinning it up:
```bash
lightdash preview --name "PR: Add Revenue Metric" --ignore errors
```
Create a temporary preview project with a random name and set the start of week to Monday, only include models with the dbt tag of `marketing`:
```bash
lightdash preview --start-of-week=0 --select "tag:marketing"
```
### `lightdash start-preview`
Create a persistent preview project using your local project files and content (charts and dashboards) copied from your [selected project](#lightdash-config-set-project).
All standard [dbt options](#dbt-options) work with `lightdash start-preview`.
**Required argument:**
* `--name [preview name]`
* Name for the preview project. If a preview project with this name already exists, it will be updated, otherwise it will create a new preview project.
**Options:**
* `--start-of-week [number]`
* Specifies the first day of the week (used by week-related date functions)
* 0 (Monday) to 6 (Sunday)
* `--skip-dbt-compile`
* (default: false)
* Skip `dbt compile` and deploy from the existing ./target/manifest.json
* `--skip-warehouse-catalog`
* (default: false)
* Skip fetch warehouse catalog and use the types defined in YAML
* `--use-dbt-list [true/false]`
* (default: true)
* Use `dbt list` instead of `dbt compile` to generate dbt manifest.json
* `--ignore-errors`
* (default: false)
* Allows deploy with errors on compile
* `--table-configuration [prod/all]`
* (default: all)
* If set to 'prod' it will copy the table configuration from the source project
* `--skip-copy-content`
* (default: false)
* Skip copying content from the source project
### `lightdash stop-preview`
Shuts down a project that was created with .
This command does not support using dbt options.
**Required argument:**
* `--name [preview name]`
* Name of the preview project to be deleted.
**Example:**
Shut down the preview project named **neon unicorn**.
```bash
lightdash stop-preview "neon unicorn"
```
### `lightdash deploy`
Compiles and deploys the current project to your [selected Lightdash Cloud project](#lightdash-config-set-project).
**It is not common practice to use this command from the CLI after initial project creation.**
This command is usually [used in Github Actions](/guides/cli/how-to-use-lightdash-deploy#automatically-deploy-your-changes-to-lightdash-using-a-github-action) or other deploy scripts.
All standard [dbt options](#dbt-options) work with `lightdash deploy`.
**Options:**
* `--create [project_name]`
* Create a new project. If a project name is not provided, you'll be prompted for one on creation
* `--ignore-errors`
* (default: false)
* Allows deploy with errors on compile
* `--start-of-week [number]`
* Specifies the first day of the week (used by week-related date functions)
* 0 (Monday) to 6 (Sunday)
* `--skip-dbt-compile`
* (default: false)
* Skip `dbt compile` and deploy from the existing ./target/manifest.json
* `--skip-warehouse-catalog`
* (default: false)
* Skip fetch warehouse catalog and use types defined in the YAML
* `--no-warehouse-credentials`
* (default: false)
* Compile without any warehouse credentials. Skips dbt compile + warehouse catalog
* `--use-dbt-list [true|false]`
* (default: true)
* Use `dbt list` instead of `dbt compile` to generate dbt manifest.json
**Example:**
Create a new project that uses the `production` credentials from your local dbt `profiles.yml`:
```bash
lightdash deploy --create --target production
```
### `lightdash refresh`
Refreshes your hosted Lightdash project using the latest code from your linked Github repository. This is equivalent to pressing **Refresh dbt** in the UI as an admin.
This command does not support using dbt options.
### `lightdash validate`
Validates a project by comparing the content in your currently selected project against your local project files. Returns all charts and dashboards that have errors.
All standard [dbt options](#dbt-options) work with `lightdash validate`.
**Options:**
* `--project [project uuid]`
* Project UUID to validate, if not provided, the last preview will be used
* `--preview`
* (default: false)
* Validate the last preview if available
* `--skip-dbt-compile`
* (default: false)
* Skip `dbt compile` and deploy from the existing ./target/manifest.json
* `--skip-warehouse-catalog`
* (default: false)
* Skip fetch warehouse catalog and use types defined in the YAML
* `--use-dbt-list [true/false]`
* (default: true)
* Use `dbt list` instead of `dbt compile` to generate dbt manifest.json
* `--only [elems...]`
* (default: \["charts","dashboards","tables"])
* Specify project elements to validate
**Example:**
Validate only dashboards and use the existing compiled dbt manifest:
```bash
lightdash validate --only ["dashboards"] --skip-dbt-compile
```
### `lightdash generate`
Generates a new `schema.yml` file or updates existing `schema.yml` for selected model(s).
All standard [dbt options](#dbt-options) work with `lightdash generate`.
**Options:**
* `-y` or `--assume-yes`
* (default: false)
* assume yes to prompts
* `--exclude-meta`
* (default: false)
* exclude Lightdash metadata from the generated .yml
* `--preserve-column-case`
* (default: false)
* preserve original casing of column names in generated schema files
* `--skip-existing`
* (default: false)
* skip files that already exist
**Example:**
Generate or update YAML file for a single dbt model to cover all columns in the database:
```bash
lightdash generate -s mymodel
```
### `lightdash generate-exposures`
Generates a `schema.yml` file for Lightdash exposures.
This command is still in beta and may be removed or updated without warning.
Only Project Admins can execute this command, since it requires access to all spaces (including private ones).
This command does not support using dbt options.
**Options:**
* `--project-dir [path]`
* (default: ".")
* The directory of the dbt project
* `--output [path]`
* The path where the output exposures YAML file will be written
**Example:**
Create or update YAML file called `lightdash-exposures.yml` in the current directory with all exposures in Lightdash:
```bash
lightdash generate-exposures --output ./lightdash-exposures.yml
```
### `lightdash dbt run`
Runs dbt and then generates or updates `schema.yml` file(s) for models that have columns missing or changed from the existing `schema.yml` files.
Any dbt option that works with `dbt run` will also work with `lightdash dbt run`. That includes all the [Lightdash dbt options](#dbt-options), and more ([see dbt run docs](https://docs.getdbt.com/reference/commands/run)).
**Options:**
* `--exclude-meta`
* (default: false)
* exclude Lightdash metadata from the generated .yml
* `--assume-yes` or `-y`
* assume yes to prompts (default: false)
* `--assume-no` or `-no`
* assume no to prompts (default: false)
* `--preserve-column-case`
* (default: false)
* preserve original casing of column names in generated schema files
**Example:**
Run a single model and create or update its `schema.yml` file:
```bash
lightdash dbt run --select mymodel
```
### `lightdash download`
Downloads all charts and dashboards from your Lightdash project as code. A `lightdash` directory is created in your working directory and all of the charts and dashboards are written there as .yml files.
E.g. if you're running this command inside your dbt directory (eg: `/home/javi/dbt`) then it will create a folder (`/home/javi/dbt/lightdash`).
You can make changes to the code and upload these changes back to your Lightdash project. Content that's been downloaded as code can still be managed in the Lightdash UI.
**Options:**
* `--charts` or `-c`
* select specific charts as code to download from your project. Use the chart SLUG, UUID or URL to specify the chart
* `--dashboards` or `-d`
* select specific dashboards as code to download from your project. This will also download all charts in the dashboard as code. Use the dashboard SLUG, UUID or URL to specify the dashboard
* `--path` or `-p`
* specify a custom path to a directory where you want the downloaded files to be written to. You can use the full path, or a relative path to a directory
* `--project `
* download all charts and dashboards from a specific project. You can find the project UUID for a project from a Lightdash URL. E.g. here, the project UUID is `123-project-uuid` `https://app.lightdash.cloud/projects/123-project-uuid/`
* `--language-map` or `-l`
* (default: false)
* generate `- .language.map.yml` for the downloaded charts and dashboards with all translatable text from charts and dashboards
**Examples:**
Download all charts and dashboards from your project.
```bash
lightdash download
```
Download a specific dashboard from your Lightdash project.
```bash
lightdash download -d https://app.lightdash.cloud/my-dashboard-url
```
Download all content from a project to the directory `/Users/katiehindson/lightdash/lightdash-analytics/`
```bash
lightdash download -p /Users/katiehindson/lightdash/lightdash-analytics/
```
This will create: `/Users/katiehindson/lightdash/lightdash-analytics/charts/` and `/Users/katiehindson/lightdash/lightdash-analytics/dashboards` and save the content to these new folders.
You can also use relative paths like:
```bash
lightdash download -p ../
```
Download all charts and dashboards from a specific project with language maps.
```bash
lightdash download --project 21eef0b9-5bae-40f3-851e-9554588e71a6 -l
```
### `lightdash upload`
Uploads charts and dashboards that you've made changes to from the `lightdash/` directory in your dbt project to your Lightdash project. To upload new content as code to your project, you need to use the option `--force` (see **Options** below).
If there have been changes made to a chart or dashboard in the application that is being uploaded from code, `lightdash upload` will overwrite the changes.
**Options:**
* `--force`
* if you've created new content as code that doesn't exist in your Lightdash project yet, you need to run `lightdash upload --force` to create the new charts and dashboards—otherwise, `lightdash upload` only uploads updates to existing content
* `--charts` or `-c`
* select specific charts as code to upload back to your project. Use the chart SLUG to specify the chart
* `--dashboards` or `-d`
* select specific dashboards as code to upload back to your project. Use the dashboard SLUG to specify the dashboard
* `--path` or `-p`
* specify a custom path to a directory where the files you want to upload are. You can use the full path, or a relative path to a directory
* `--project `
* upload all charts and dashboards from a specific project. You can find the project UUID for a project from a Lightdash URL. E.g. here, the project UUID is `123-project-uuid` `https://app.lightdash.cloud/projects/123-project-uuid/`
* `--skip-space-create`
* (default: false)
* Skip space creation if it does not exist
**Examples:**
Upload all charts and dashboards in code from your `lightdash/` directory to your Lightdash project.
```bash
lightdash upload
```
Upload a specific dashboard to your Lightdash project.
```bash
lightdash upload -d my-dashboard-slug
```
Upload content from the directory `/Users/katiehindson/lightdash/lightdash-analytics/`
```bash
lightdash upload -p /Users/katiehindson/lightdash/lightdash-analytics/
```
This will upload all content from: `/Users/katiehindson/lightdash/lightdash-analytics/charts/` and `/Users/katiehindson/lightdash/lightdash-analytics/dashboards` and save the content to these new folders.
You can also use relative paths like:
```bash
lightdash upload -p ../
```
Upload all charts and dashboards from your `lightdash/` directory to a specific project.
```bash
lightdash upload --project 21eef0b9-5bae-40f3-851e-9554588e71a6
```
### `lightdash rename`
Rename model or field names across all content in your Lightdash project. This command will do a full find and replace on a field or table so all references in chart fields, dashboard filters, table calculations, custom metrics, etc. can be changed at once.
**Arguments:**
* `--type`
* Specify what you're renaming
* Accepted values: `field` or `model`
* `--from`
* The current name of the table or field you want to change (this is the slug from your YAML definition, i.e. `num_users`)
* `--to`
* The new name you want to use (must match the new slug in your YAML for this field or table, i.e. `count_distinct_user_id`)
**Options:**
* `--project`, `-p`
* Project UUID to target a specific project
* (default: The most recent project you set with `lightdash config set-project`)
* `--model`, `-m`
* The model to target for field renaming. This is only needed if the current field name is not unique in your project
* `--dry-run`
* List all content the rename action will change, no changes will be made
* `--list`
* List all charts and dashboards that were renamed after the command is complete
* `--assume-yes`, `-y`
* Assume yes to all prompts.
**Examples:**
Rename the field `num_users` to `count_distinct_user_id`.
```bash
lightdash rename --type field --from num_users --to count_distinct_user_id
```
Do a dry run of changing the table reference from `users_mart_v1` to `users`.
```bash
lightdash rename --type model --from users_mart_v1 --to users --dry-run
```
Rename the field `count` to `count_distinct_order_id` in the `orders` model and list all affected content when complete:
```bash
lightdash rename --type field --model orders --from count --to count_distinct_order_id --list
```
***
## dbt options
These are options from the dbt Core CLI that also work with some Lightdash CLI commands.
### dbt node selection
You can select a subset of your dbt models by using the following options on any Lightdash commands that support dbt options.
**Node selection:**
* `--select [models...]` or `-s [models...]`
* [Read the dbt docs on select](https://docs.getdbt.com/reference/node-selection/syntax#shorthand)
* `--exclude [models...]`
* [Read the dbt docs on exclude](https://docs.getdbt.com/reference/node-selection/exclude)
* `--selector [selector_name]`
* [Read the dbt docs on selector](https://docs.getdbt.com/reference/node-selection/yaml-selectors)
### dbt flags
These dbt flags work with Lightdash commands that support dbt options. [Read the dbt docs on global config flags](https://docs.getdbt.com/reference/global-configs/about-global-configs#available-flags) for details.
* `--project-dir [path]`
* `--profiles-dir [path]`
* `--profile [name]`
* `--target [name]`
* `--no-version-check`
* `--state [state]`
* `--full-refresh`
* `--defer` (works with `lightdash preview` and `lightdash compile`)
### dbt project variables
You can set dbt project variables in Lightdash commands that support dbt options. [Read the dbt docs on project variables](https://docs.getdbt.com/docs/build/project-variables) for details.
`--vars [vars]`
### dbt threads
You can set the number of threads for dbt in Lightdash commands that support dbt options. [Read the dbt docs on threads](https://docs.getdbt.com/docs/running-a-dbt-project/using-threads) for details.
`--threads [number]`